What you will change
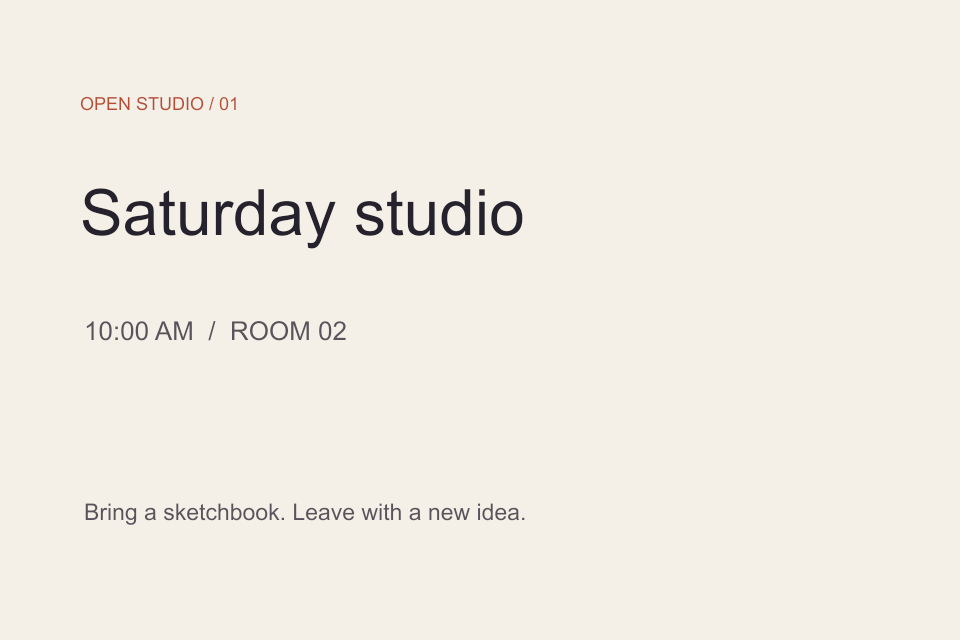
The practice file is a small workshop poster. Its headline reads “Saturday studio” in Arial. We change it to “Sunday studio” in Georgia at 64 pt, save a new PSD and read the text layer back from that file. The other three text layers stay in place.
We completed this edit in the PhotoCraft 0.18.0 desktop app on Windows x64, then repeated it with the CLI. The interface in our screenshots is Chinese. The English instructions name the same controls. Our sample was created in PhotoCraft; we have not tested it in Photoshop.
Desktop 1. Open the practice poster
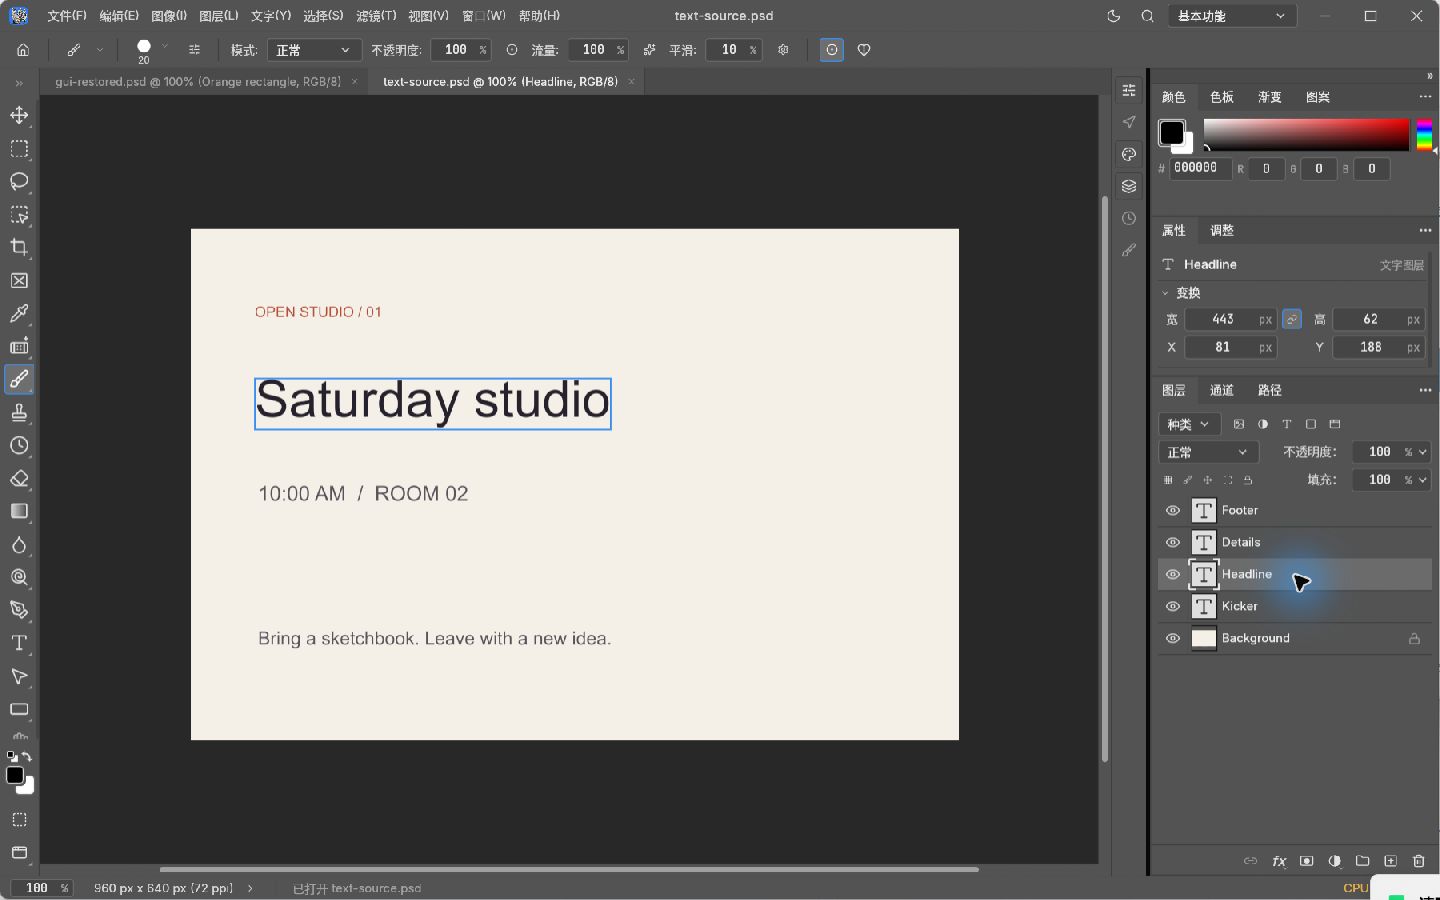
Download text-source.psd, make a working copy and open it with File → Open (Ctrl+O). In the Layers panel, select Headline. The poster contains four Type layers and a Background; clicking Footer would change a different line.
Our machine had Arial and Georgia installed. The sample does not include those fonts. If Georgia is missing, choose an installed family you are licensed to use and expect a different width.
Desktop 2. Replace the words
The text becomes shorter without moving its starting point. The document tab gains an asterisk because the change is not saved yet.
- Choose the horizontal Type tool (T), shown as 横排文字工具 in our screenshots. Click inside Saturday studio on the canvas.
- Press Ctrl+A while the text is being edited. Check that the words are highlighted, then type Sunday studio.
- Press Ctrl+Enter to apply the edit. Do not press Ctrl+A while an unrelated field or the whole canvas has focus.
Desktop 3. Change the font
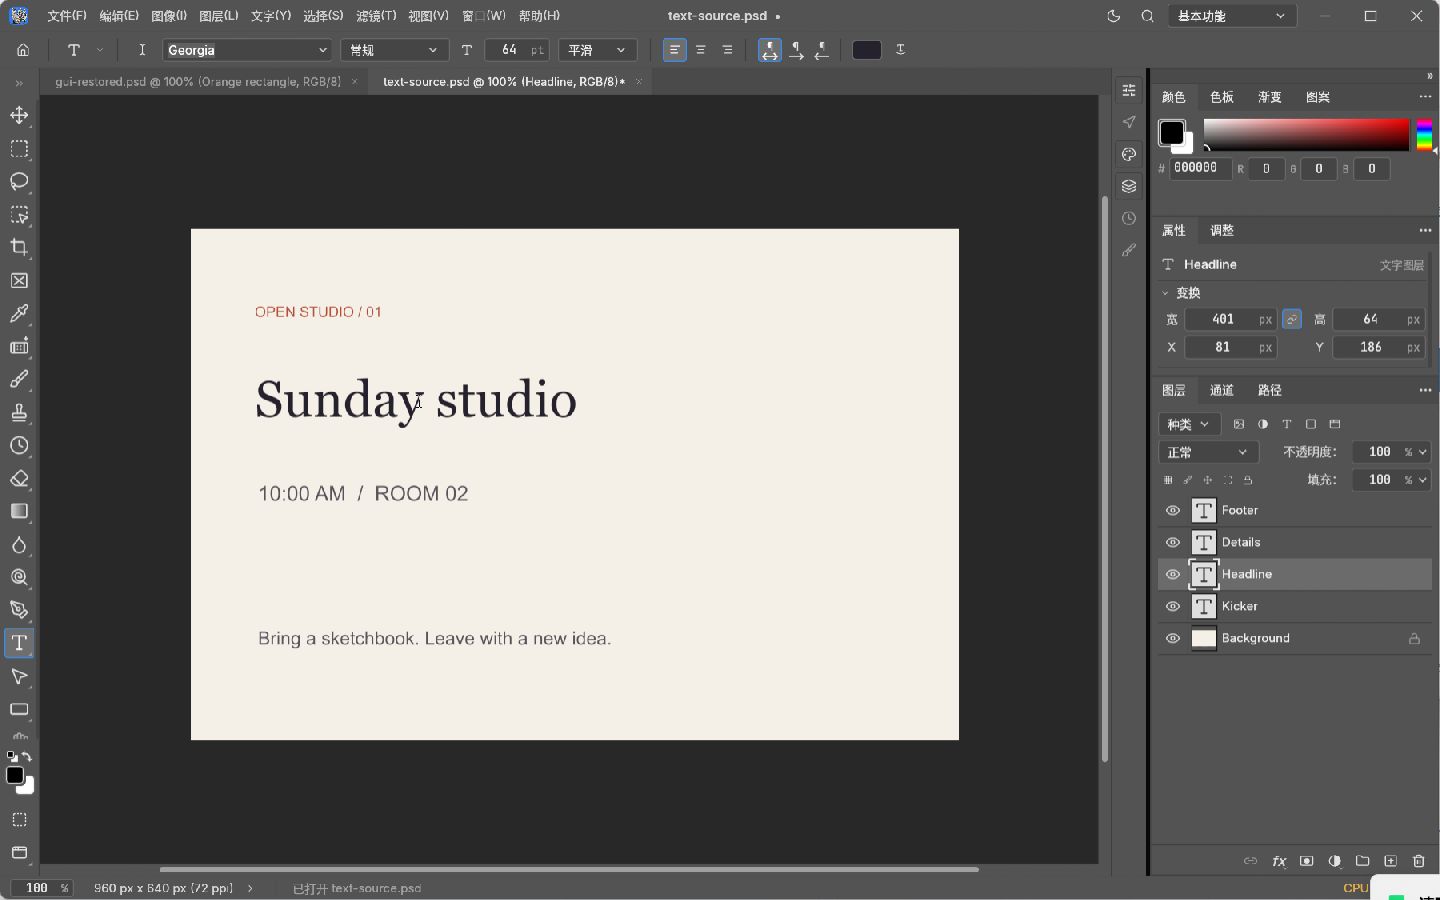
With Headline selected and the Type tool active, use the font-family field in the top options bar. Enter Georgia and press Enter. Keep the size at 64 pt. If the suggestions are still open, choose the Georgia family.
The serif letters should now match the example below. Check the entire headline after changing a font: keeping the same point size does not keep the same line width.
Desktop 4. Save a new PSD and reopen it
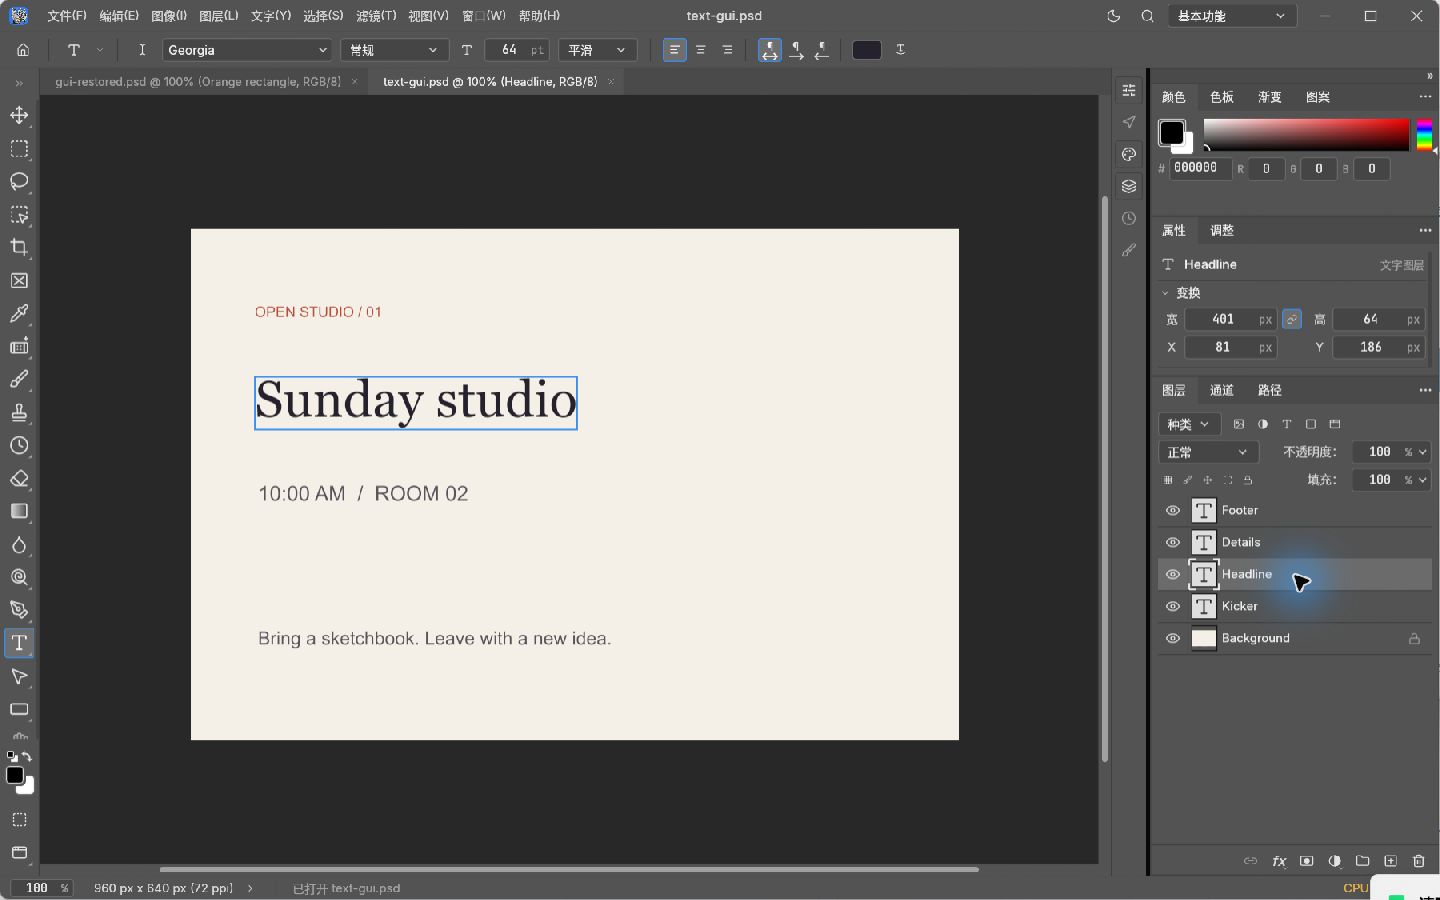
Use File → Save As (文件 → 另存为…) and name the file text-gui.psd. Keep the PSD format. Close the document, open text-gui.psd from disk, then select Headline again.
Our reopened file still showed Sunday studio in Georgia at 64 pt. Its four Type layers and Background were present. We also read this GUI-saved file with the CLI; it reported the same words, font, size and five-layer stack.
Repeat the edit with the CLI
For the command-line route, put text-source.psd next to photocraft-cli.exe and open PowerShell 7 there. These commands select the layer by name, make the edit, save a separate PSD and read it back. We ran them with the same 0.18.0 Windows x64 package.
In type.info, check text = Sunday studio, font_family = Georgia and size_pt = 64.0. An independent repetition confirmed those values and a five-layer PSD.
.\photocraft-cli.exe run .\text-source.psd --cmd layer.select --params '{"name":"Headline"}' --cmd type.edit --params '{"text":"Sunday studio"}' --cmd type.setStyle --params '{"font":"Georgia","size":64}' --out .\text-edited.psd
.\photocraft-cli.exe run .\text-edited.psd --cmd layer.select --params '{"name":"Headline"}' --cmd type.info
.\photocraft-cli.exe info .\text-edited.psd
Scroll to view all columns on a small screen.
| Check | Observed result |
|---|---|
| Saved text | Sunday studio |
| Saved font and size | Georgia · 64 pt |
| Layer stack after reopening | 4 Type layers + Background |
| Canvas | 960 × 640 px · 8-bit RGB |
Export a preview for sharing
For a flattened preview of the CLI result, run the command below. PhotoCraft warns that the five layers will be flattened. Keep text-edited.psd, or the desktop result text-gui.psd, if the next person needs to change the wording.
Compare the PNG at its full 960 × 640 size. Check that the headline fits, the date and footer have not moved, and no letters touch the edge. A font can be saved under its family name and still look different on a computer that substitutes another face.
.\photocraft-cli.exe convert .\text-edited.psd .\text-after.png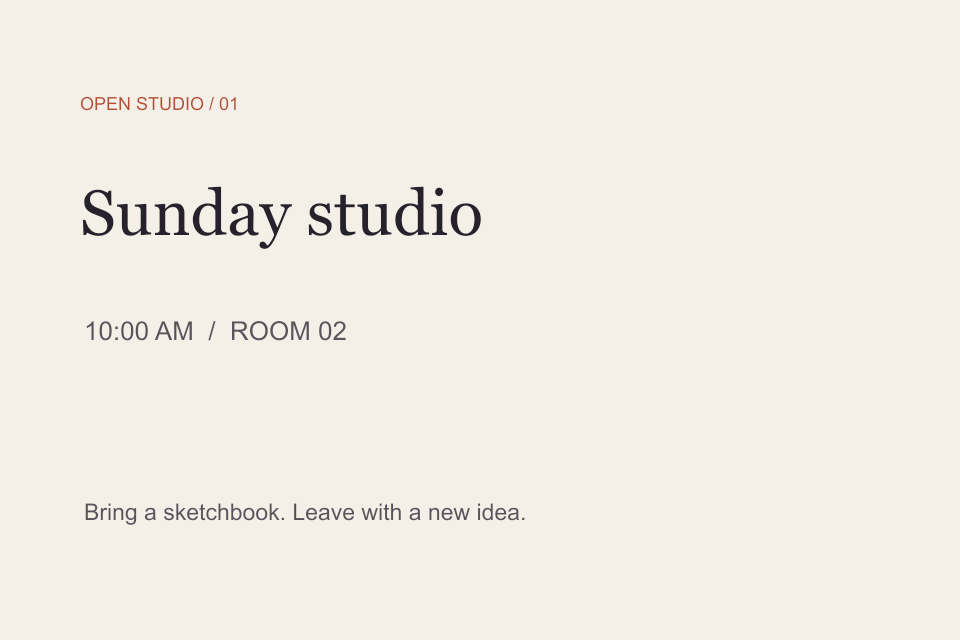
If the result differs
- No layer named Headline: use the supplied PSD or inspect your own layer names with info. A flattened photograph containing words does not have editable type.
- Different spacing or line breaks: check the installed font before changing the canvas or text size. Our screenshot is evidence of our machine’s output, not an embedded copy of Georgia.
- The PNG cannot be edited as type: reopen the PSD. Exporting a PNG flattens the text with the other layers.
- The command reports an error: stop before the next step and check the file path, JSON quotes and selected layer. These examples were run in PowerShell 7.
How did your practice go?
Tell us whether you reached the result shown above.
For a correction, include the step and app version through our corrections channel.