What this exercise does
A layer mask controls which parts of a layer are visible. We tested a simple rectangular mask in PhotoCraft 0.18.0 on Windows x64 using the included command-line tool. The starting document is a 640 × 480 PSD with an orange rectangle on a transparent canvas.
We selected a smaller rectangle inside the orange layer, created a mask from that selection, saved a new PSD and reopened it with PhotoCraft’s info command. The layer still had a mask. We then disabled the mask in another copy: the larger orange rectangle became visible again.
We repeated this CLI exercise on 4 November 2026 with the same 0.18.0 build. The files linked here are the outputs of that run. We also created and reopened a mask in the desktop app, as shown below.
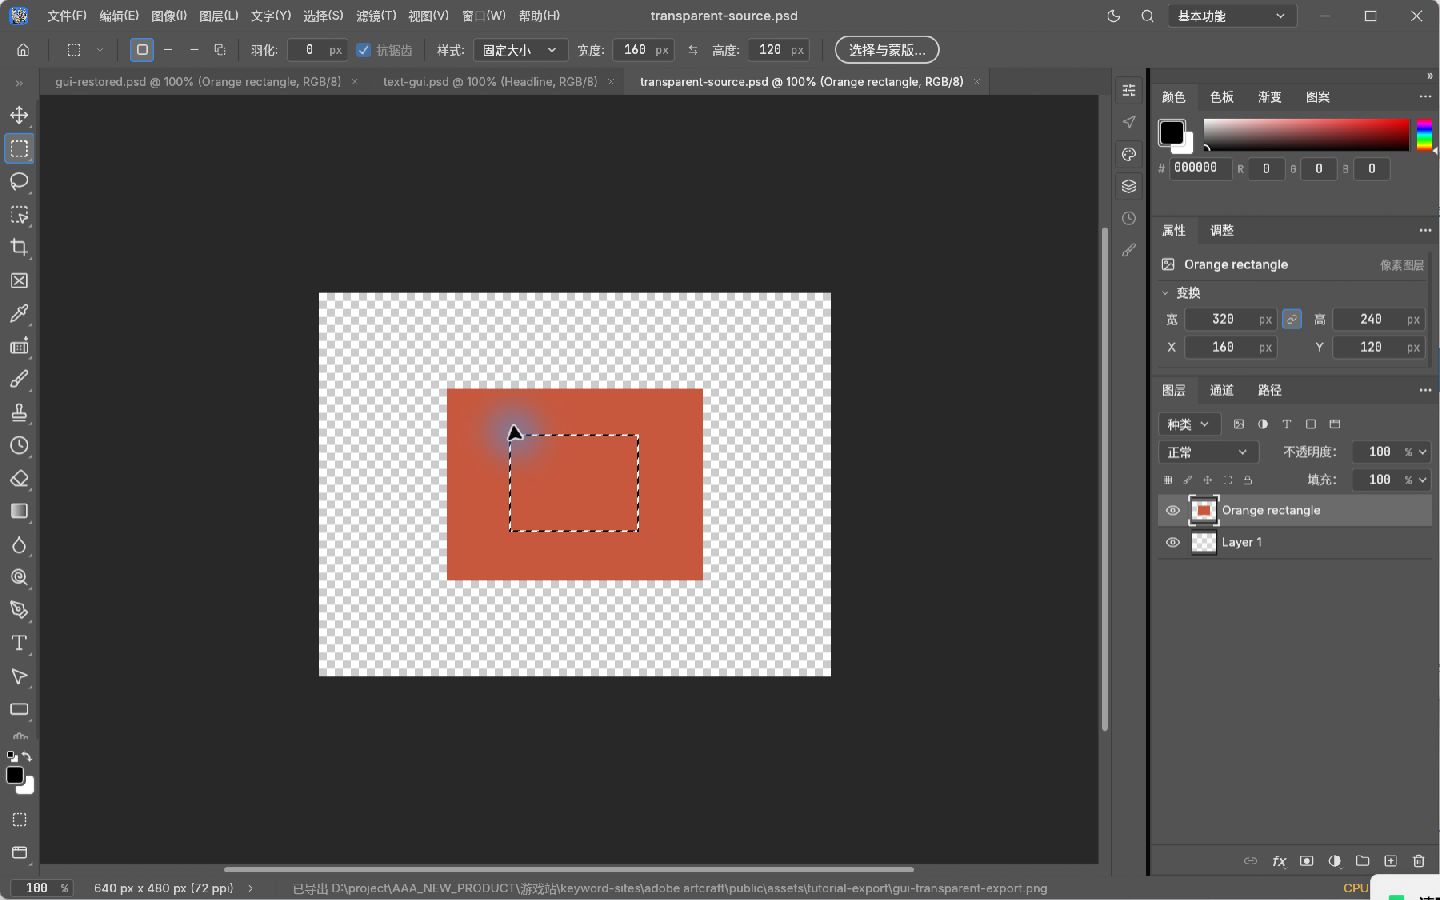
Desktop 1. Make a small rectangular selection
Open transparent-source.psd and select Orange rectangle in Layers. Choose the Rectangular Marquee tool (M). In the top options bar, set Style to Fixed Size (样式 → 固定大小), Width to 160 px and Height to 120 px. Leave Feather at 0.
Click inside the orange rectangle to place the selection. Keep the whole selection within the coloured area. Its exact position can differ from ours; the fixed width and height give you the same-sized window.
Desktop 2. Add the mask, save and reopen
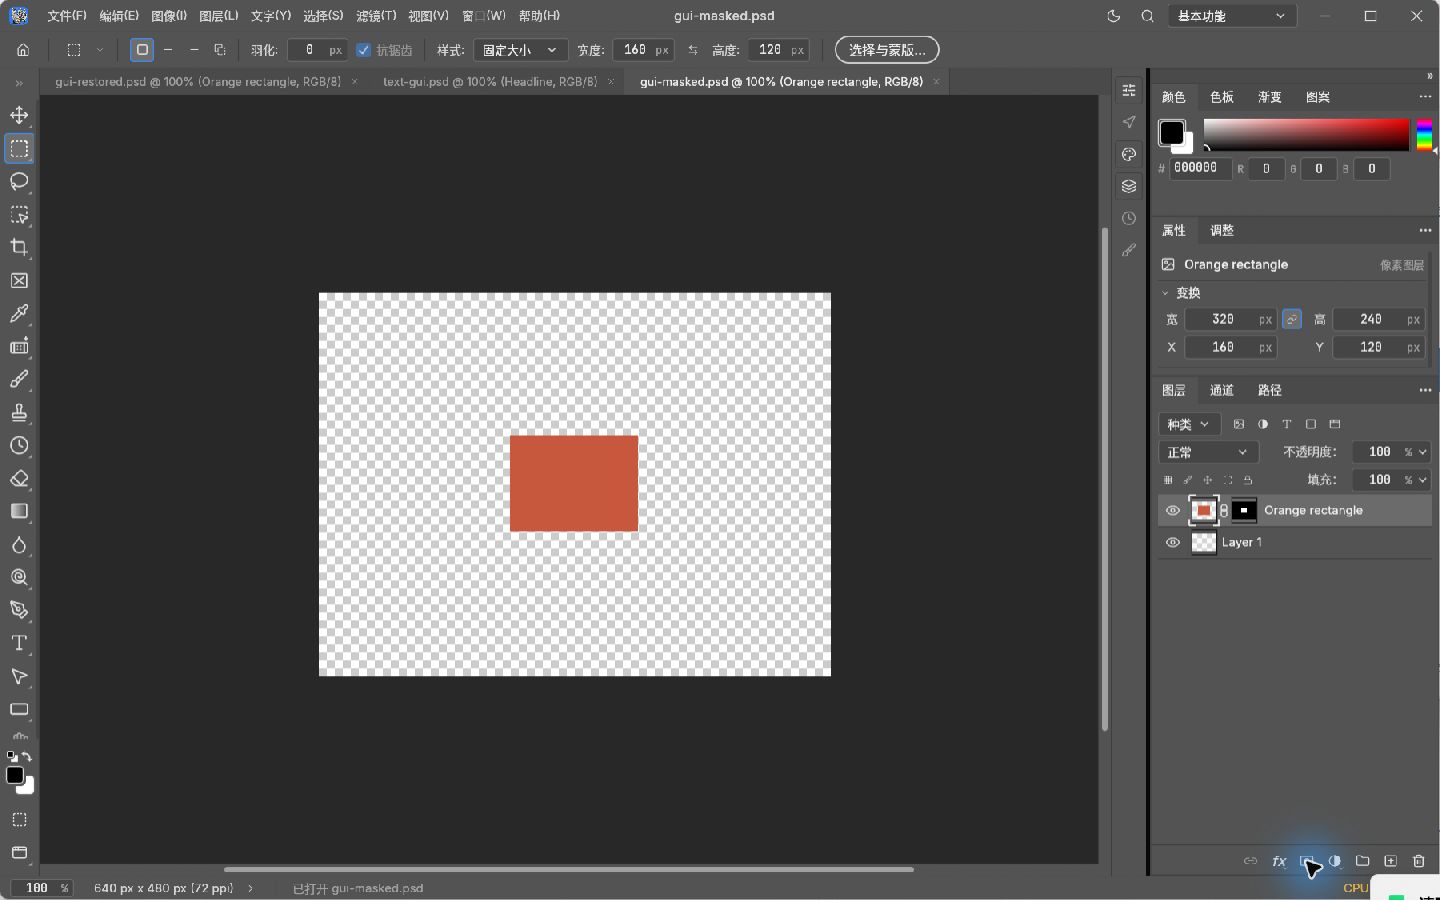
Click Add layer mask at the bottom of the Layers panel: the rectangle icon with a circle inside it. In this test, PhotoCraft used the selection for the mask and cleared the selection. Only the small orange area stayed visible.
Use File → Save As to save gui-masked.psd. Close it and reopen that saved file. You should still see the smaller rectangle and a mask thumbnail beside Orange rectangle. We performed this save-and-reopen check on 4 November 2026.
Desktop 3. Disable the mask to recover the image
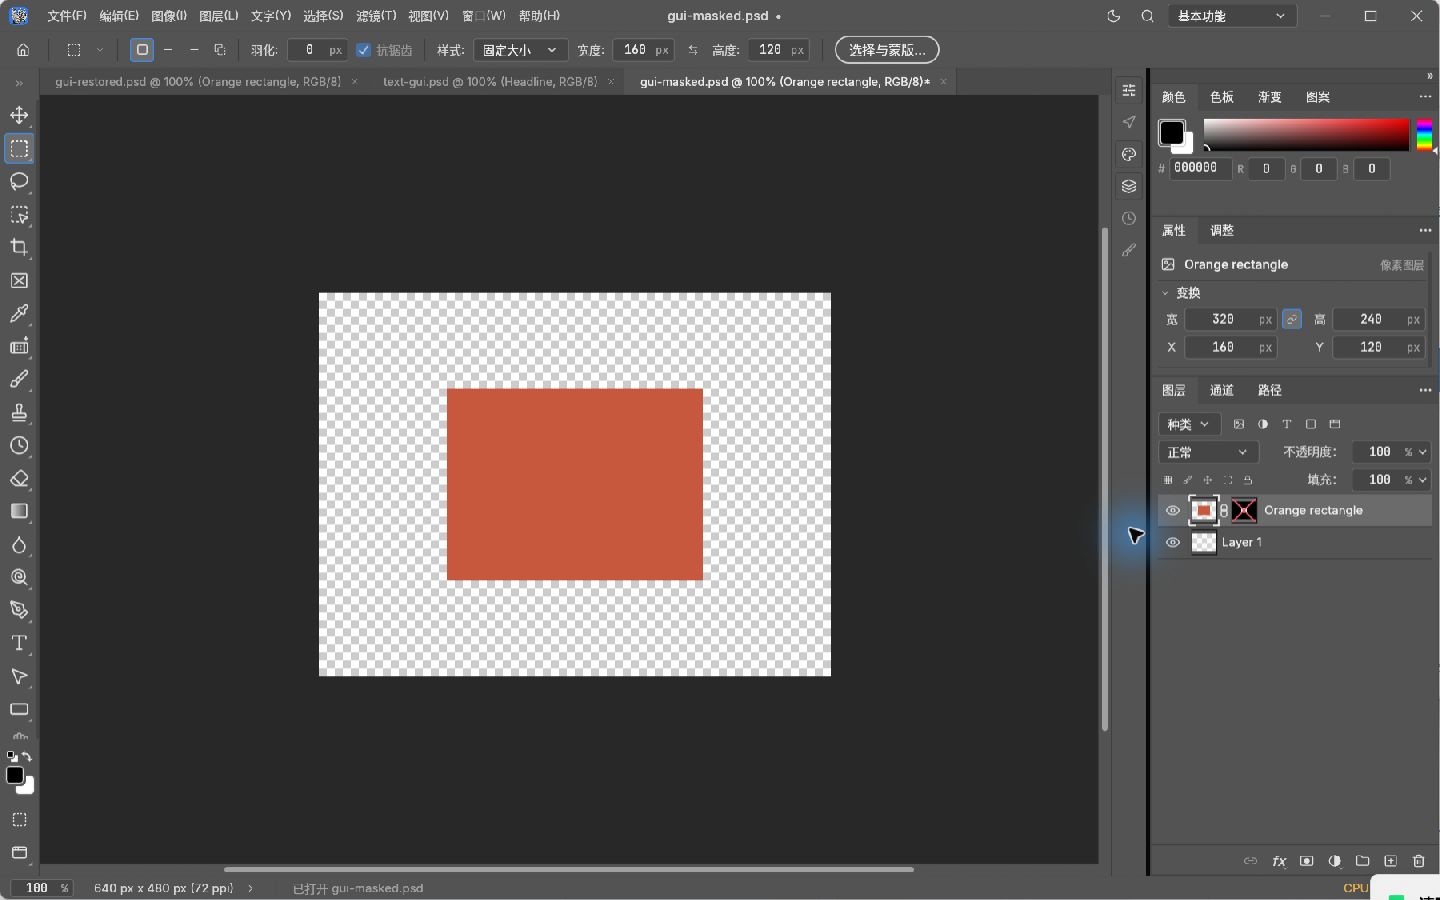
Right-click the mask thumbnail beside Orange rectangle and choose Disable Layer Mask (禁用图层蒙版). The larger orange rectangle returns. A red cross appears over the disabled mask thumbnail.
Right-click it again and choose Enable Layer Mask (启用图层蒙版) to restore the smaller visible area. We re-enabled the mask before saving the downloadable example. Disabling the mask changes visibility without erasing the original pixels.
Before you begin
Keep an untouched copy of the starting PSD. Our file was created in PhotoCraft and contains two pixel layers. It is a controlled example, not a Photoshop-created project. We did not test text, smart objects, soft mask edges or transfer back to Photoshop.
The commands below were run in PowerShell 7.6.5 with the PhotoCraft 0.18.0 Windows x64 portable package. They use the executable photocraft-cli.exe. Put a copy of transparent-source.psd in the same folder as the executable and open PowerShell in that folder. Use new filenames for your outputs.
CLI 1. Select the area to reveal
Run the following command as one line. It opens the starting PSD, selects a 160 × 120 rectangle at x=240 and y=180, creates a layer mask from the selection, clears the selection and saves a new PSD.
.\photocraft-cli.exe run .\transparent-source.psd --cmd layer.select --params '{"name":"Orange rectangle"}' --cmd select.rect --params '{"x":240,"y":180,"width":160,"height":120}' --cmd layer.layerMask.revealSelection --cmd select.deselect --out .\masked.psdCLI 2. Reopen the PSD and inspect the mask
Run this command to read the saved file:
- Find the layer named Orange rectangle in the output.
- Check that its kind is Pixel and hasMask is true.
- Check that the document is still 640 × 480.
.\photocraft-cli.exe info .\masked.psdCLI 3. Export a preview
Run the following command, then open the PNG in a viewer that can show transparency.

.\photocraft-cli.exe convert .\masked.psd .\masked.pngCLI 4. Compare with the mask disabled
To check that the mask is hiding pixels in this example, make a separate PSD with the mask disabled, then export it. The first command leaves masked.psd intact.

.\photocraft-cli.exe run .\masked.psd --cmd layer.layerMask.enabled --params '{"enabled":false}' --out .\mask-disabled.psd
.\photocraft-cli.exe convert .\mask-disabled.psd .\mask-disabled.png
Check the result and its limits
The masked PNG had an opaque centre pixel at x=320, y=240. At x=200, y=150, inside the original orange rectangle but outside the revealed area, its alpha was zero. With the mask disabled, that same pixel was orange and opaque. Both PNG conversions warned that the two layers were flattened.
These checks show what happened with this one file and build. They do not prove a different PSD, a soft-edged mask or a Photoshop round trip will behave the same way. Keep the layered source and test the exact handoff your recipient needs.
How did your practice go?
Tell us whether you reached the result shown above.
For a correction, include the step and app version through our corrections channel.