What we tested
We used PhotoCraft 0.18.0 on Windows x64 and its included command-line tool. Starting with a self-created 640 × 480 PSD, we changed the selected orange pixel layer from full opacity to 0.5, saved a new PSD and reopened it. We exported a PNG, then restored the layer to full opacity in another PSD copy and exported a second PNG.
After reopening, PhotoCraft reported the layer opacity as approximately 0.502. The centre pixel of the first PNG had an alpha value of 128; the restored PNG’s centre was 255. Both conversions warned that the two layers were flattened.
We repeated this CLI exercise on 4 November 2026 with the same 0.18.0 build. The files linked here are the outputs of that run. A desktop restore from the saved half-opacity sample is shown below.
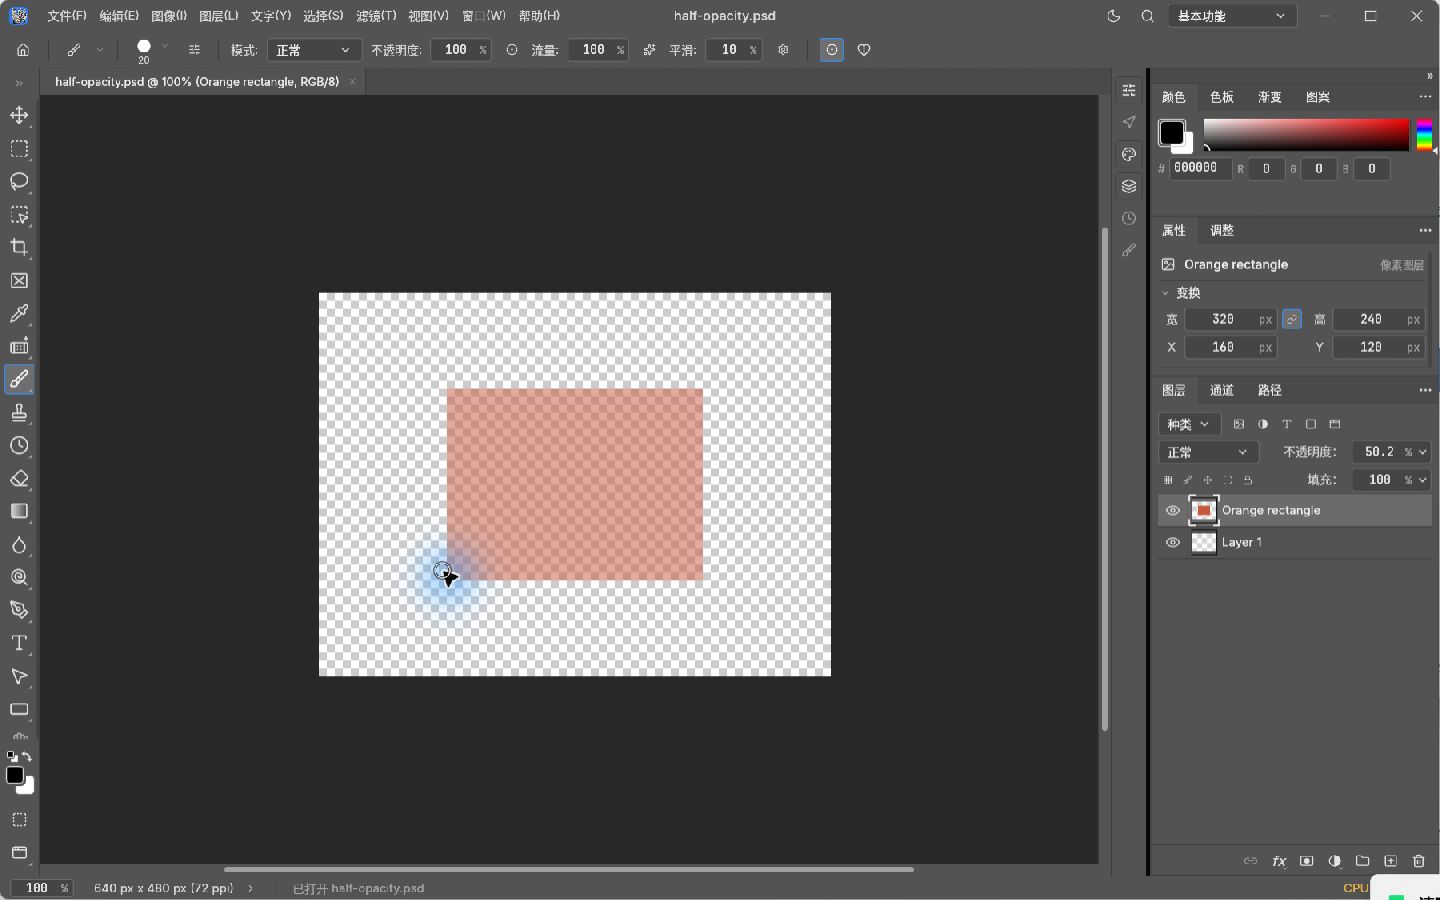
Desktop: compare 50% with 100%
Open half-opacity.psd in PhotoCraft 0.18.0 and select Orange rectangle in the Layers panel. In our desktop test, the layer Opacity field (不透明度) read 50.196%. That corresponds to the saved value 128/255 described below.
Use the Opacity field in the Layers panel, not the tool-opacity field in the top bar. Change it to 100. The rectangle becomes solid orange; the empty canvas around it remains transparent.
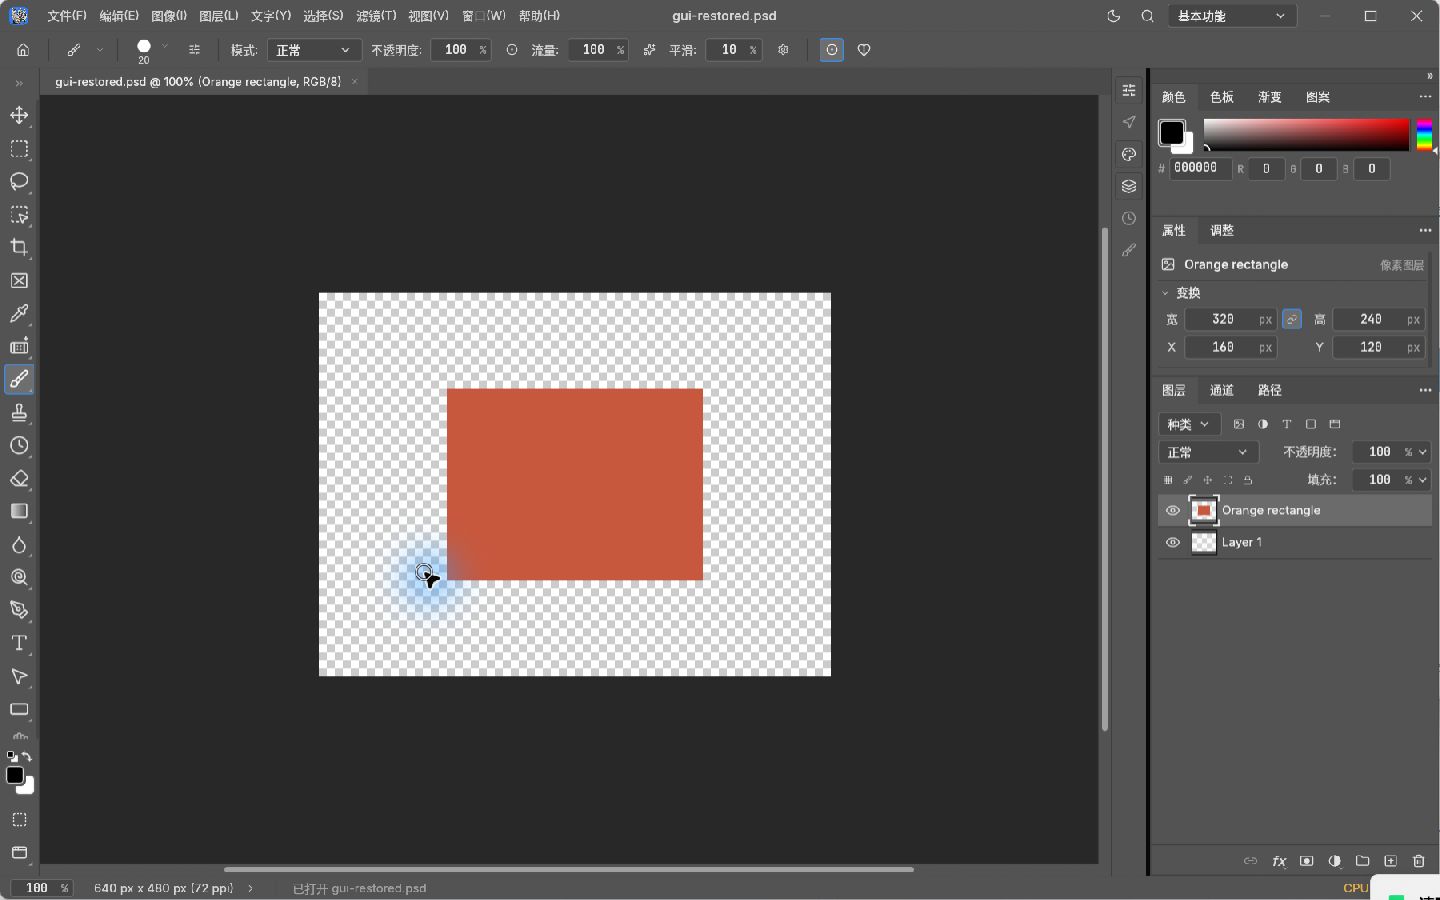
Desktop: save and reopen the restored layer
Use File → Save As (Ctrl+Shift+S) to save gui-restored.psd. Close it, open that saved file again and select Orange rectangle. The Layers panel should still show 100%.
We completed that sequence on 4 November 2026. The reopened PSD had two pixel layers; a separate CLI inspection reported opacity 1 for the orange layer. The commands below show how to create the 50% example and compare the exports.
Before you start
Keep the original PSD and work on a copy. Our sample was made in PhotoCraft, not Photoshop. It has two pixel layers: Orange rectangle is selected, and the layer underneath is empty. It does not test text, effects, masks or other editors.
We ran the commands in PowerShell 7.6.5 using the Windows x64 portable package. Copy transparent-source.psd into the folder containing photocraft-cli.exe, open PowerShell there, and use new output filenames. If you already have a file with one of these names, choose another name.
CLI 1. Save a copy with 50% opacity
Run the following line. The opacity value uses a scale from 0 to 1; 0.5 requests half opacity. The command changes the selected layer and writes a separate PSD.
- Keep transparent-source.psd unchanged.
- Run the command and check for an error before continuing.
- Use a different output name if half-opacity.psd already exists.
.\photocraft-cli.exe run .\transparent-source.psd --cmd layer.select --params '{"name":"Orange rectangle"}' --cmd layer.setProps --params '{"opacity":0.5}' --out .\half-opacity.psdCLI 2. Reopen the saved PSD and read the layer value
Use the following command to inspect the file saved in the previous step:
- Find the selected pixel layer named Orange rectangle.
- Read its opacity. Our saved file returned 0.501960813999176, approximately 128/255.
- Confirm the document is 640 × 480 and both sample layers are still listed.
.\photocraft-cli.exe info .\half-opacity.psdCLI 3. Export a PNG and inspect transparency
Run the next line, then open the PNG in a viewer that displays transparency. PhotoCraft warned that the two source layers were flattened in our export; keep the PSD for further edits.

.\photocraft-cli.exe convert .\half-opacity.psd .\half-opacity.pngCLI 4. Restore opacity in a separate copy
Run these two lines in order. The first writes a new layered file; the second exports a flattened preview from that file.

.\photocraft-cli.exe run .\half-opacity.psd --cmd layer.setProps --params '{"opacity":1}' --out .\restored.psd
.\photocraft-cli.exe convert .\restored.psd .\restored.png
Why 0.5 became approximately 0.502
In this saved file, the reported value corresponds to 128/255. The exported PNG centre pixel had RGBA values 199, 88, 61, 128; after restoring opacity, the corresponding pixel was 199, 88, 61, 255. The top-left canvas pixel remained transparent in both images.
A small rounding difference in this sample is not evidence that every document will render identically. Compare your own output over both light and dark backgrounds, especially around soft edges. A viewer’s background can change how a transparent PNG looks.
Keep the editable file for handoff
A flattened PNG can show the appearance but does not carry the editable PSD layer stack. Save a layered copy for further work and ask the recipient to reopen it in their own editor. We did not test this sample in Photoshop or verify a Photoshop-to-PhotoCraft round trip.
How did your practice go?
Tell us whether you reached the result shown above.
For a correction, include the step and app version through our corrections channel.