What we tested
We used PhotoCraft 0.18.0 for Windows x64 in portable mode on a 640 × 480, 8-bit RGB sample. The sample has a white Background, a solid-colour fill, an empty Retouch layer and a Brightness/Contrast adjustment. We created the sample with PhotoCraft’s command-line tool, then opened and edited the saved PSD in the desktop app.
The desktop interface in these screenshots is Chinese; the English names below follow the labels in the layer panel. We tested the particular sample shown here. It does not establish compatibility with PSDs made in Photoshop or files containing live text, smart objects or complex masks.
1. Get a practice copy
Download the practice PSD below and keep an untouched copy. If your browser displays the file instead of saving it, use the link’s Save link as option. Open the copy in PhotoCraft with File → Open (Ctrl+O).
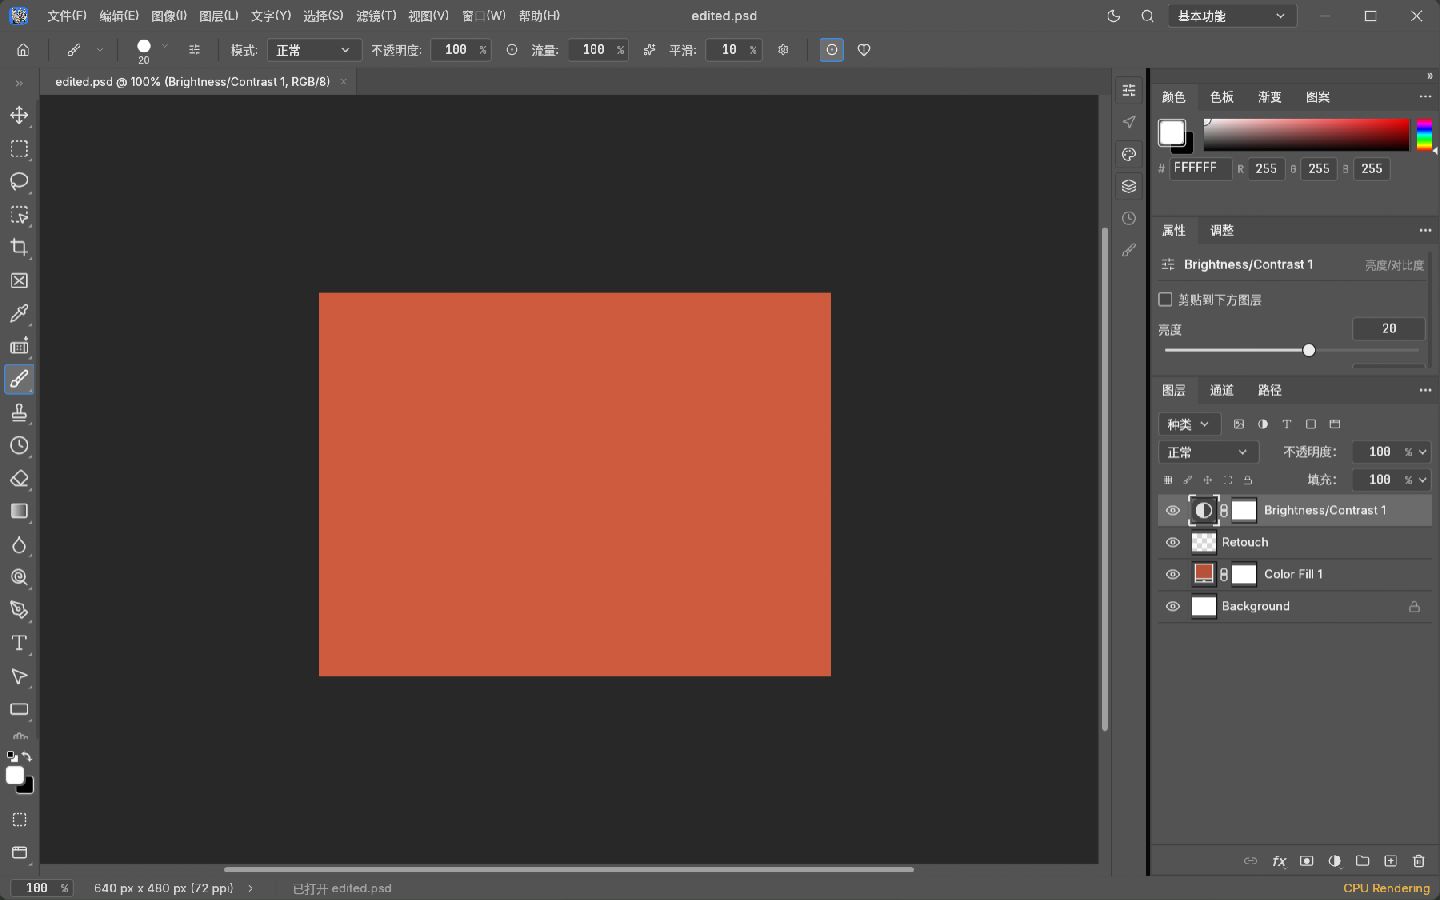
The document is a simple terracotta rectangle. In the Layers panel, select Brightness/Contrast 1. In our opened copy, Properties showed brightness 20 and contrast 10. The screenshot shows the file after we reopened it from disk.
Find your way around the layer panel
A PSD can contain several layers. In this exercise the Background and colour fill supply the visible image, while Brightness/Contrast changes its appearance. Select the adjustment layer to see its settings in Properties; selecting the empty Retouch layer will not show those controls.
Keep the PSD when you need to continue editing. A PNG is a flattened image for sharing; it does not preserve the editable adjustment layer.
2. Change the adjustment
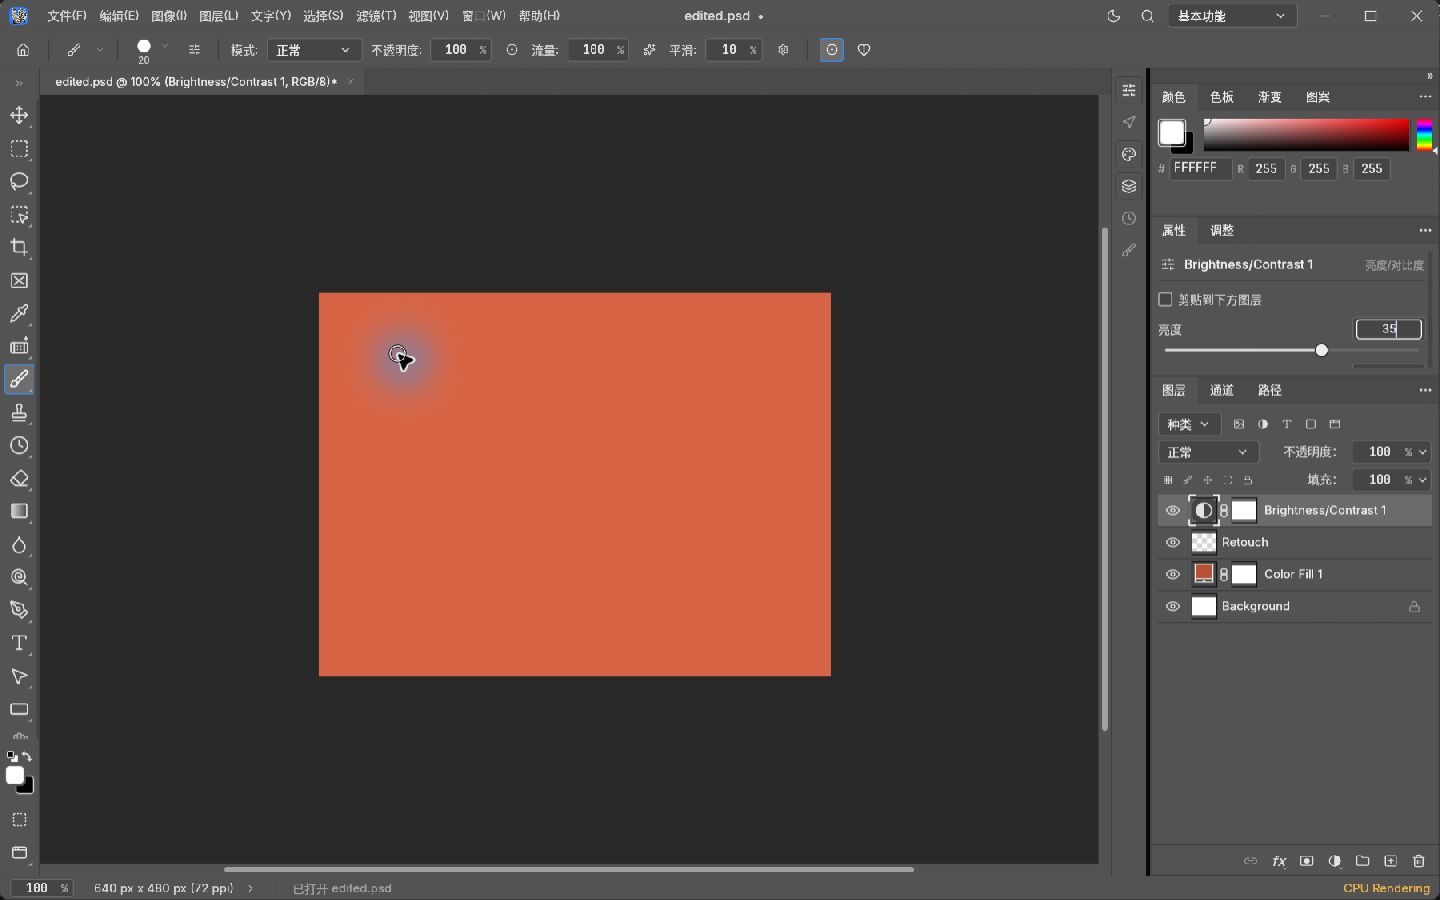
With Brightness/Contrast 1 selected, find Brightness in Properties. Change 20 to 35. Leave Contrast at 10. In our test the canvas became lighter and the tab displayed an asterisk, indicating an unsaved edit.
If Properties is not visible, open it from the Window menu. If the controls are missing, select the adjustment layer rather than the empty Retouch layer or the fill layer.
3. Save and reopen
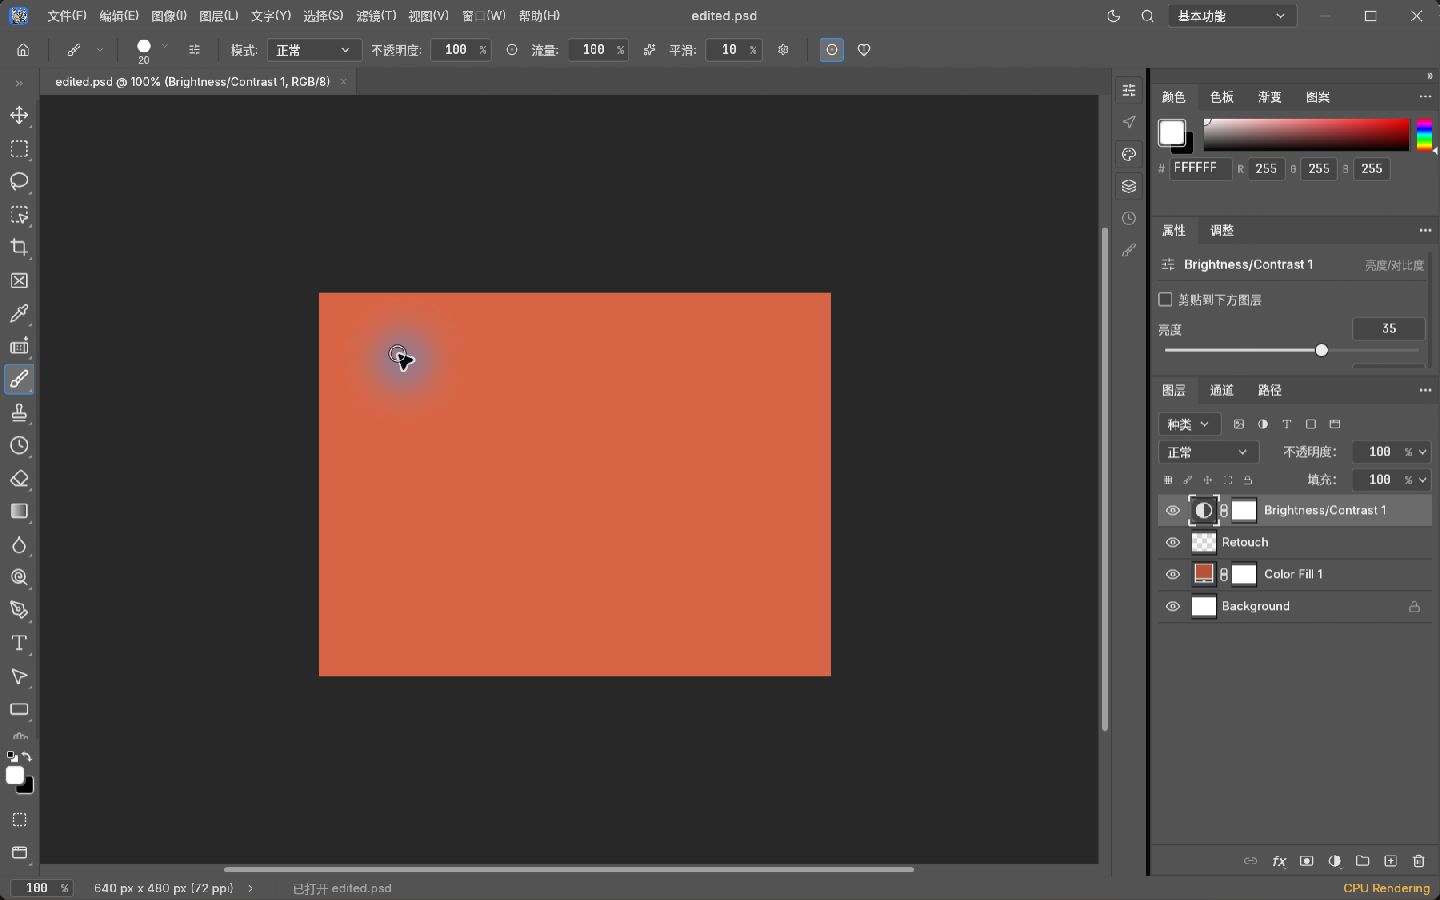
Press Ctrl+S to save your working copy. Close the file or open it again from disk. Select Brightness/Contrast 1 and inspect its Properties.
On reopening our edited PSD, the layer panel still contained the adjustment, Retouch, Color Fill 1 and Background. Brightness read 35 and Contrast read 10. PhotoCraft’s command-line info output agreed with those values after the desktop save.
4. Check the file before handing it over
A PSD that reopens in the same app is a useful first check. It does not prove another editor will preserve every layer. If someone else needs to edit the file, ask them to open a copy in their own application and inspect the content they need to change. Keep the original until they confirm the handoff.
We also converted our sample to PNG with PhotoCraft’s command-line tool. The tool warned that the four layers would be flattened. Use a layered PSD for further edits and a PNG when a flattened image is what the recipient needs. We did not test the PNG in a separate editor.
Troubleshooting and limits
- No adjustment controls: select Brightness/Contrast 1 and look in Properties.
- Value changed but did not persist: save the working file, reopen that same file, and check the adjustment again.
- Your project looks different: compare fonts, masks, blend modes and linked assets one at a time using a duplicate. This simple sample does not test those features.
- Need to keep the original: make a copy before editing. This tutorial changes only the practice copy.
How did your practice go?
Tell us whether you reached the result shown above.
For a correction, include the step and app version through our corrections channel.